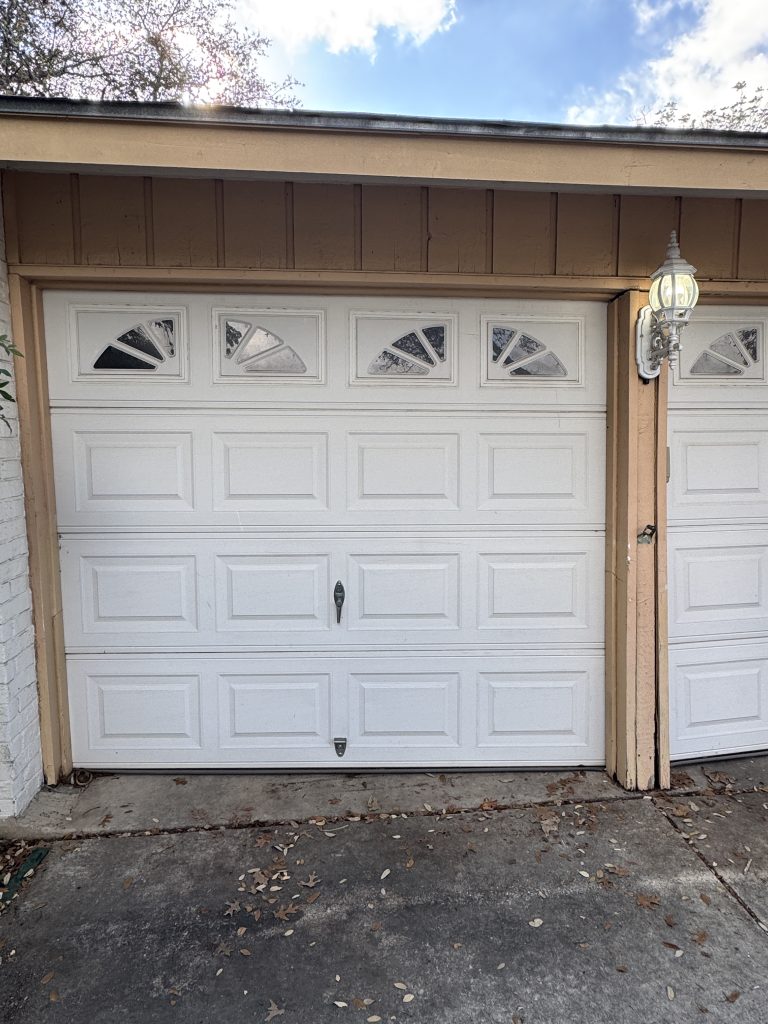
The exterior wood header trim above your garage door is splitting and sagging primarily due to long-term moisture penetration, sun degradation, and fastener failure. When unsealed casing boards absorb rainwater, wood rot and thermal cycling cause the timber to cup, delaminate, and pull away from the framing, threatening to obstruct the top door section.
SAFETY WARNING: Never attempt to hammer, pry, or screw into header boards near your garage door mechanism without professional guidance. The overhead torsion springs are anchored under immense mechanical tension to the structural jambs and center bearing pad directly behind this trim. Compromising these structural fasteners can trigger an explosive release of spring tension, resulting in severe physical injury.
Understanding Header Trim Degradation vs. Structural Framing Issues
The horizontal framing above your garage opening consists of two distinct components: the load-bearing header (which carries the roof and wall weight) and the exterior trim or fascia boards (which seal the exterior envelope and provide aesthetic finish). While cosmetic trim often deteriorates first, severe splitting and sagging can point to deeper moisture intrusion or underlying structural movement.
Over time, exterior lighting installations, missing drip caps, and degraded caulking allow water to seep behind the fascia. As the wood swells and contracts across seasons, exterior casing nails lose their bite. If neglected, the dropping wood trim will eventually collide with the top garage door section, binding the rollers within the radius track and burning out the automatic opener motor.
Causes vs. Solutions for Sagging Garage Door Header Trim
| Root Cause | Operational Impact | Professional Solution |
|---|---|---|
| Missing or Damaged Z-Flashing / Drip Edge | Rainwater pools on top of the trim, initiating dry rot and horizontal splits. | Install continuous aluminum drip cap flashing beneath siding and replace rotted trim. |
| Rusted or Inadequate Fasteners | Fascia pulls loose and drops downward into the door path. | Secure replacement exterior composite or treated lumber using structural exterior-grade screws. |
| Structural Header Deflection | Door jams at the top center; header visibly bows under roof load. | Structural framing reinforcement, sistering, or LVL header replacement by licensed specialists. |
| Over-Tightened Exterior Fixtures | Splits wood along grain lines, creating avenues for water intrusion. | Properly seal fixture backplates and mount through reinforced, uncompromised backing. |
How to Safely Inspect Your Overhead Door Header
Homeowners can safely monitor their garage door header condition by performing a visual audit from outside the moving door’s path:
- Check Clearance at the Top Section: Operate the door and verify there is at least 1/2 inch of clearance between the top edge of the upper panel and the sagging trim board.
- Look for Wood Rot and Soft Spots: Visually inspect the split seam for black mold, discoloration, or crumbling fibers, especially beneath exterior light fixtures.
- Inspect Top Weatherstripping: Check whether the perimeter seal has pulled away, torn, or begun dragging against the garage door face during cycle movement.
- Check the Center Spring Anchor Pad: From inside the garage, ensure the wooden spring mounting pad bolted to the interior header remains flush, plumb, and completely crack-free.
When to Call a Professional Garage Door Technician
If your exterior header trim has sagged low enough to rub against the garage door, discontinue using your electric opener immediately to avoid track derailment or motor gear stripping. Replacing or repairing overhead framing requires detensioning the torsion springs and realigning the door track geometry. Contact a certified overhead door technician to assess framing stability, realign clearances, and protect your door system from mechanical binding.